Dec 21, 2010

Staying Fit with Bernarr MacFadden

Everywhere you look these days, people are reaping the benefits of a revolution in vigorous exercise. We realize many of these people are chiropractors and massage therapists, but no matter. Countless magazines are devoted to providing the floppy public with tips on keeping fit and living longer – so why should we here at Snake Oil Sewing not take advantage of these trend seekers?  Our experts offer you modern, well-researched exercise routines designed to help you maintain a healthy, well-formed physique. Run and get your sweat suit and let’s begin! Before you know it, you may find yourself feeling like a whole new person.

(But don’t go nuts like this fellow. He fasted for over forty days to achieve his look.)

Today is the first day of Winter. As Bernarr Macfadden so astutely pointed out, “The man must indeed be lacking in warm red blood who does not feel the call of the great open air when winter spreads its beautiful white mantel over the earth and keen breezes sweep down from the north.” I suspect that many of you have yet to feel any keen breezes this year. Where I live, it’s supposed to get into the 80s today! But let’s stiffen ourselves and begin, anyway. Since Mr. Macfadden really seems to know what he’s talking about, we’ll turn to Volume II of his Encyclopedia of Physical Culture for our instruction. (All text shown here in bold type shall come directly from this groundbreaking study.) Now don’t worry that this happens to be the 1920 edition; there can’t have been that many breakthroughs.

Probably one of the most common faults among young enthusiasts in physical culture is the tendency to excess in exercise. (You know, I don’t know what possessed me to introduce this paragraph with such a silly statement. Please ignore it.) What we want to start out with is a good stretching routine. Let’s not dilly-dally with prissy little exercises that pass as real stretching and that any old hag can pull off. This isn’t a stretch; it’s flirting!


Now, let’s begin with The Sideways Lean Pose. I saw a lot of giraffes in Botswana do this, and they are certainly among the sleekest and skinniest of animals. Put your whole back into it! That’s what it’s for. No pain, no gain!

Continue back and forth until tired.

In discussing the weaknesses of this part of the body we continually come back to the baneful influence of the corset. We simply cannot escape the consideration of this iniquitous device, just as women who wear it cannot escape the inexorable physical dilapidation which it brings about….But how much more pleasing must it be to the woman of today to know that the figure she presents is truly her own, so that instead of the hypocrisy of displaying a purchased form [!], she may take pride in the consciousness that the admiration of others [i.e., men] comes in response to the charm of her own real self. Boy, you said a mouthful there, Mr. M!

Next up: Touch Your Toes. If Thoroughly Modern Millie, here, can do it then so can you. Go ahead. Just bend over and touch them. They’re not that far away, are they?


Okay, now that we’re all limbered up and ready to go, let’s try a bit of dancing! Youth, eternal youth, is the very cry of every normal woman – at least in her heart….Why, it even keeps the voice young.

Dancing has locked many a medicine chest. Now, you may say to me, “But I haven’t the natural grace and charm to be a dancer.” And if this were a picture of you, I’d have to admit you’re right:

But, please, dear friends: these dances are simple enough for anyone to work out alone. And if you happen to possess and outfit like this one, then I think we can all agree that you should work out alone.


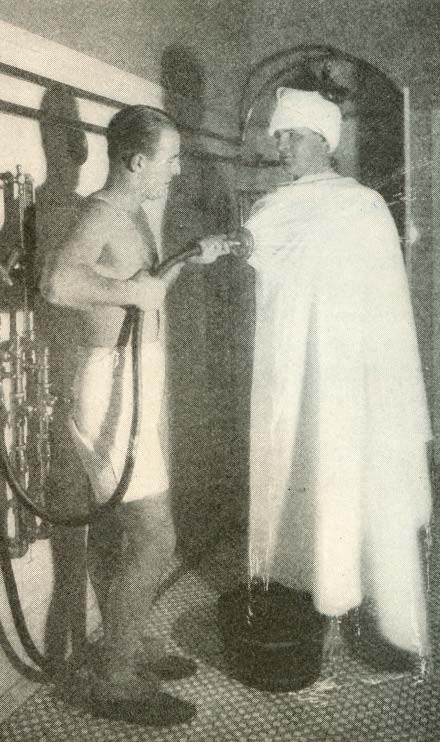
That’s all for today, friends!  I don’t know about you, but I’m worn out just typing this thing. I can’t even get out of my chair. It’s time for one of Bernarr’s excellent baths, I think.

In our next physical culture installment, you’ll meet the real Mister Atlas and learn what it takes to win a cock fight.  And maybe some sewn garments will make an appearance.


Dec 17, 2010

Flea Market Tote Bag


How many times have I gone to IKEA and forgotten to bring my blue IKEA bag?  I get up to the register and have to buy yet another blue IKEA bag.  That's a very clever trick, IKEA Corporate, but that won't work anymore!  Behold the “Left Bank Granny Bag”,  which is pictured here on the cover of the book in which the pattern resides. 

The book says it was designed to carry the junk you pick up in flea markets, which is one activity I plan on using it for.  I think I found out about this book from someone’s blog.  I got my copy from Amazon, but my sister says they also have it at Barnes & Noble.  There’s a lot of good stuff in here but it really isn’t recommended for the beginning sewer. However, this particular bag was actually pretty easy. The book includes paper patterns or, as in the case with this bag, detailed diagrams are provided.  I made myself a paper pattern rather than doing something reckless like drawing it out on the fabric. Don’t do that!


The fabric is a (discontinued?) heavy cotton from IKEA and the lining is some nice blue, medium-weight cotton I got at JoAnn’s.  The book suggests lining it with cotton twill, but I’m glad I didn’t choose anything that heavy.  The stuff I used works just fine and I don’t see that the bag really needs that heavy a lining.  Surprisingly, this thing maintains its shape pretty well and is very easy to carry.  Don’t be fooled by its over-sized demeanor. It’s perfectly proportioned (unless you are a really tiny person).  I put a bunch of junk in it one day and it managed things just fine.

There is, however, a flaw in one of the diagrams.  You have to cut out two top edge bands and then fold them lengthwise.  But I suspect the measurement given is for the finished size when folded.  You can see that the upper band on my bag is too thin. As is typical, I didn’t even notice it while I was sewing.  Am I going to bother to unpick all those stitches and make a new band?  Ha! I laugh at that!


I really wanted this bag and envisioned an afternoon struggling with the heavy fabric and with me saying, “Boy, I’ll never make one of these again!”.  But, no! I do plan to make this again.  It was fun and easy.  You just have to find yourself the appropriate needle and take your time.  The only part that will slow you down are the pleats.  You have to adjust them yourself – there are no markings for them.


It calls for a zippered interior pocket.  I didn’t like the way they wanted me to put this thing in, so I made sort of a zippered patch pocket instead.  This bag’s instructions includes a matching drawstring bag, which I may make.  Who knows? I have a lot of that fabric left.
(See the orange zipper just peaking out, there?)


The only change I made, aside from the pocket, was to edge-stitch the bottom corners (are those technically corners?)  I think it adds a little definition to it.  You can just see what I mean off to the left, there.  See how the edge is a bit squarish?

And it’s machine-washable!  So, all-in-all: a success!


Dec 14, 2010

It's Time for a Soothing Bath


Now, winter is well upon us and for you folks in cold climes you're going to want to learn some novel ways to keep toasty warm until the ice in the harbor starts to break up.  Not to worry: Dr. Jones is here to assist.  Thanks to my acquisition of the 1937 edition of Macfadden's Encyclopedia of Physical Culture (Volume VI), I've learned there are many different types of healthful baths you can take.  Let's have a look, shall we?

(Be sure to click to enlarge each picture.)

The poor gentleman shown in Fig. 1 below is enduring a "Brand Bath" which means that bucket there has been filled with bone-chilling 50-degree water.  It’s for his own good, of course. He knows that!  The dirty trick with this bath is that the water -- 2 to 3 gallons of it -- must be poured very slowly over the victim/patient.  But you're smart: improvise and use 110-degree water instead!  I would advise you to find a more attractive water-bearer, though.

 Figure 1.

Now, if a tub isn't your thing, then enlist the aid of a rubber-slippered friend and a wet blanket to engage in a series of healthful dowsings whilst standing in a sturdy wooden bucket (as in Fig. 2).  The bucket's importance is unclear but I wouldn't take any chances by omitting it.  Please note the dramatic, film noir lighting.  You can achieve this at home with the aid of a photographer's spot lamp.

Figure 2.

Don't like all that water? An sunbath like the one if Fig. 3 might be more your style.  Since the sun leaves us early in winter, you may have to rely on an artificial sunbath, as illustrated below.  Don't attempt this without the goggles!  The aid of a friend isn't necessary, but why spoil his fun by excluding him?

 Figure 3.
 
That's all we have time for today.  Join me next time to learn all about proper hair and scalp care!


Dec 6, 2010

A Glimpse of Madness


Today’s horror show is a before-and-after of my sewing closet.  
 This is a bad scene, isn't it?  Let's see.  On the far right just outside the closet are piles of fabric and that white-ish thing is a sloper, sort of.  In the closet are a wooden stool with fabric on it, two IKEA bags filled with crap, pattern boxes on the top shelf, and fabric hanging on hangers.  To complete the look, I've left plenty of bits of pattern pieces and junk on the floor!


Those are boxes of thread, an old wooden set of drawers from when I was a baby (!), boxes of patterns (mostly old Vogues) and a pile of nicely-wrinkled interfacing.  That red stuff is some yet-to-be-pre-cleaned coat fabric.


And here's the after! 
I moved the old wooden set of drawers out in the open and put my mother's old Singer on top (not pictured, but off to the right).  Those drawers are badly organized but will eventually have thread, machine needles and who knows what else in them.  It’ll house things I don’t necessarily need to have during a project. 

I bought two wire racks at Lowe’s and was happy to find they were exactly the right size for the little platform table thing I built in there.  I have lots of space, but no organizing skills whatsoever.

What you can’t see in this picture is the dump that is the rest of my sewing room.  What can you do?


Nov 30, 2010

New Look 6808

This photoshoot business isn’t really working out well, is it?  Well, you can at least see it.  In real life, this is a bit more pink and not so orange.  I chose the collar from View C but left off the bow.  Here is the line art:


This was made from a really nice, lightweight cotton I found on the bargain table at Hancock’s.  I thought this fabric needed something with a vintage look. I would have made a dress if there had been more fabric on the bolt.  As you can see, this top doesn’t quite fit right but that’s okay.  Nobody can claim that I tend to over-fit patterns. 

 
I shortened the upper bodice and sleeve caps by a half inch, which I like because the armholes are higher and I can freely move my arms up and down – a bit of a novelty for me!  As usual, I had to broaden the back and I think that amount was 1.5 inches, total across.  That’s a lot!  I made that increase down the entire length of the back.  The bust dart on the right is higher than the one on the left, which has happened to me before.  I finally figured out yesterday that it’s because my right shoulder is meatier/higher than my left and it’s pulling the bodice up just a bit.  I’ll have to make that correction on the right from now on.  I think the increased muscle mass is from all the dope-slapping I have to engage in at my job.

I moved the zipper from the side to the back and made the collar adjustment accordingly.  My muslin had the zipper at the side and I found it to be very annoying.  Next time, I’m going to alter the back to have buttons instead.   


I found the neck facings don’t lay flat and they’re a bit narrow.  When I make this again, I’ll just use bias binding instead.  Also, the way they have you sew the sleeve facings is dumb.  They make you sew them in the round and that includes doing the slit, which is just a little V.  I did that on my muslin and it was not easy to maneuver that V! This time, I just applied the facings flat.

One other thing about this pattern: it’s long.  I usually have to lengthen all tops and jackets a full inch, but this thing is long all by itself!  That’s very unusual.

This pattern would work in a lot of different fabrics, from casual to fancy.  This would be nice in a stretch velvet, I think.  I wonder where I could find some?

Nov 18, 2010

Hot Patterns Wong-Sing-Jones Marrakesh Drawstring Pants

Clearly I need to work on my photographic technique.  But let's get down to business.
It’s about time I finished these things!  I made these months ago and they’ve been sitting around waiting for a hem, which is pretty sad considering I put the rest of the pants together in one day.  I guess I wasn’t as crazy about them as I wanted to be.  I finally did the hem last night.  These were made from a crisp linen that looks a bit like denim.  I underlined them with silk organza and did my usual contrasting zipper.  They really do add the pounds, don’t they?
 
These offer fly-front styling with drawstring comfort (the drawstring has elastic in the back) and this is about the fourth time I’ve made this pattern.  The first time, I made them in my size out of a nice drapey green linen (as suggested) and they were so big that I could put them on and take them off without undoing the drawstring, the button, or the zipper! (C’mon – who’s going to make a muslin for loose, drawstring pants?)  I had some ugly, why-the-hell-did-I-buy-this? dark salmon-colored linen laying around so I made them again about a half-size smaller.  This time I had to at least undo the drawstring.  Then I made them in a flimsy linen with silk organza underlining a full size smaller. Success! 

It’s a good thing I’ve made a lot of pants in my life because these come with the absolute worst instructions I have ever seen, bar none.  I would have fired the person who wrote and illustrated them along with the printer who couldn’t seem to print the envelope without the text bleeding off into oblivion.  A beginner would get totally lost in these instructions.  It’s like someone dictated them over the phone to someone who doesn’t sew.  And there aren’t any useful notches and the crotch points don’t match up properly.  I had to redraw that part before cutting them out. The drawings for how to do the fly are the size of a postage stamp. I’m not kidding, man.  A postage stamp!  If I still had them, I’d show you.  I could draw these instructions out on a paper napkin in a bar after a couple of margaritas and do better than Hot Patterns did!  Okay, I’m done.
Some people like Hot Patterns because they’re printed on heavy paper.  HEAVY paper.  I had to use soup cans as pattern weights to cut them out because I am not spending almost seventeen bucks, plus shipping, to trace a pattern.  I’ve had tissue patterns I’ve used a jillion times and they’re still good.  Don’t get me started.

In order to torture myself further, I did buy another Hot Patterns jeans-style pattern because the reviews on PatternReview.com were good and I liked the style.  So stay tuned for those one of these days.  But this is probably it for me and Hot Patterns.

Nov 17, 2010

Burda Hemp Pants

(Sorry about the bad photos.  After I took them, I realized I should have turned on the overhead lights in that room.  Next time!)

These pants were thrown together using a pattern from the April 2000 Burda Magazine.  I’ve had it all these years and have never made anything from it until now, which is a shame since there’s a lot of good stuff in there.  It’s no surprise that I’m 10 years behind the times with this. 


These were made from a cinnamon-colored cotton/hemp I ordered from fabric.com.  Unfortunately, these are considered burnt orange where I live, so I have to wear them carefully.  I can’t say I particularly recommend this fabric.  It’s coarse, not at all very interesting and doesn't have much in the way of drape.  I also bought some in yellow and who knows what monstrosity I’ll make out of it.  The price was right, though: 10 bucks a yard for 54” wide fabric.  I think I’ll wash the yellow stuff about 3 more times to see if it softens up a bit.  I’d tell you to watch this space for an update but really: don’t hold your breath.

Because I fall somewhere in the realm of a Big 4 size 12 (I’d be a 13 if they made that size), I originally made this in a size 38 using some nice silk tweed I got from a fabric swap. But those turned out a tad too big and I felt my sanity slipping away from me all day at work when I first wore them.  I plan to take them in, which should be pretty easy.  Considering that,  I made these hemp ones in a size 36.  I love the shape of the wide, curved waistband and, if you look at the picture carefully, you can spot the little invisible zip pocket that sits in the seam between the yoke and the leg.  I do need to shorten the front crotch length a bit, though, but I think they fit pretty well.   They could stand to loose a bit of fabric in the back leg.  I'll fix that on the pattern next time.


These things were so easy and fast to make, I couldn’t believe it. The day I made the silk tweed ones, I came home from work and traced out the pattern from the magazine.  Then I added the seam allowances.  Then I chose my fabric only to find I didn’t have enough by, like, 2 inches.  So I agonized for about 15 minutes over what to make them out of and settled on the silk.  I ironed the fabric and cut out the pattern.  Then I made them up while drinking a glass of wine.  After two hours, I had everything done but the hem!  

These hemp pants have a side invisible zip.  I got lazy and machine-stitched the hems (I hand-stitched the silk ones, of course; what do you take me for?)

Nov 15, 2010

Odd Flea Market Find

What in tarnation is this crazy scene?  This was taken in a junk shop in Georgetown, Texas.  I'm trying to figure out what on earth these cushions are for, but nothing's coming to me.  I leave it up to you to ponder this.

Cocktail of the Month

Frosty Lemon
* * * * *
I guess you can tell where this "sewing" blog is going when the first post is a cocktail recipe accompanied by a very poorly-photographed subject.  This concoction comes to us courtesy of my friend Carol and it goes a little like this:
3 ounces of lemon-flavored vodka
3/4 to 1 ounce of lemoncello liquer
4 teaspoons fresh lemon juice
1 Tb superfine sugar
Yeah, you read that right: sugar.  If you're drinking almost 4 ounces of booze, I can hardly see where you find a problem with a little bit of innocent sugar.  This drink really needs it, so don't leave it out.
Shake all this up in an ice-packed shaker (as shown) -- shake like mad! You might prepare your delicate drinking vessel by lining the rim with some more of that sugar.  In fact, I think you'll find this adds a touch of class to the drink.  You can garnish this with a thin slice of lemon or, for color interest, lime.  A bit of advice is warranted, here: go easy easy on the lemoncello or you run the risk of overpowering the drink with that flavor. Remember: you can always add more.

Enjoy!